Looking for the best method to change your Facebook profile name in 2018? Here, I have written the direct trick with step by step guide on How to Change Facebook Name Before 60 Days After Limit Has been Exceeded.
As we know, Facebook is best place to stay connected with your friends. On Facebook, you interact with your friends by doing chatting, liking, commenting or other activities. Facebook is the best way to utilize extra time online.
You will easily able to know what’s trending and going viral. Basically, We use Facebook to update status, images or other from our memories. But to use Facebook, you have to add some personal information which is required by Facebook in order to make better user experiences.
Basically, We use Facebook to update status, images or other from our memories. But to use Facebook, you also have to add some personal information which is required by Facebook in order to make better user experiences.
You might have added many personal details like bio, date of birth, email, mobile number and use your name on your profile. So, someone can easily find you just by searching your Name. Many people love to share status on a regular basis and many of us love to change Facebook Profile Name frequently.
But the problem is that You can’t able to change your name after the limit. Under “Setting”, Facebook provides you the option to Change Profile Name but the new problem comes is We can’t even able to change our name before 60 days once we did it.
How to Change Facebook Name After Limit 2018

How to Change Facebook Name before 60 Days(Trick 1)
In this Trick, you might want to report to the Facebook as if your account recently went through unauthorized access and this leads you to confirm some changes that were made to your Facebook account that might have taken place while it was accessed by someone else without your consent.
It mostly includes a recent name change, so you have to select a name that you want to use for your facebook account from the drop-down list.
Steps to Change Facebook Name before 60 Days:
- First of all, go to http://facebook.com/hacked.
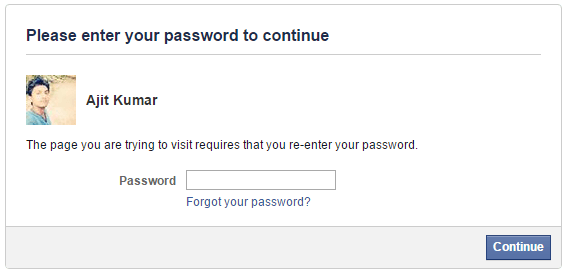
- You will be asked to enter your Account Password.

- Just enter your password after that it will redirect to many different security procedures.
- You might also have to enter a new password.
- After continuing, they will show you that you have recently changed your account name.
- Then all the previously used names will be displayed there and select any of the listed names.
- Just select the name from the drop-down list that you want to use for your account and click Continue.
- And Finally, your name should be successfully changed.
How to Change Facebook Name before 60 Days After Limit Crossed (Trick 2)
This trick of changing Facebook profile name is very helpful if you misspelled your name or other cases. Well, there is still a way that will give lets you change facebook account’s name without waiting for 60 days.
But, before you change your name make sure you have the following document ready before you get into the process.
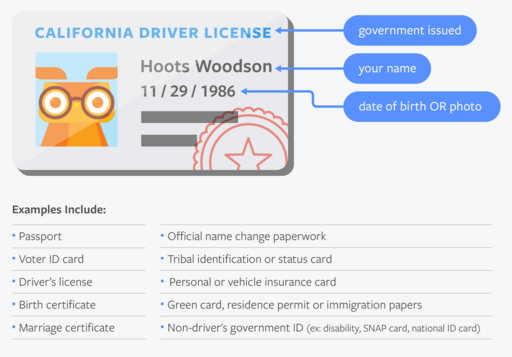
Government ID issued Identity card: A Scanned copy of one of your Government ID issued Identity card that has Your Name, Date of birth or Your Name and photo.

Don’t have Government-Issued ID Card?
Don’t worry, there is still an option. You need to Have TWO NON-GOVERNMENT OPTIONS. You need to have two different forms of ID and the names on your IDs must match each other. One of the IDs must include a photo or Date of birth that matches them with the information on your Facebook profile.
You can find more details about what type of ID does Facebook accept, Click Here.
Steps to Change Facebook Name before 60 Days After Limit Exceeded:
- Go to your Facebook Account.
- Try to change your name. If the profile name limited is exceeded then you may get something like below
You can’t change your name right now because you’ve already changed it within the last 60 days. Learn more.
- Now if you want to change your Facebook Profile Name then Click here.
- Fill the form i.e. First Name, Middle Name (if any) and Last Name.
- Under “Reason for this change”, select the best suitable reason. We recommend “Legal Name Change” if your name change is legit.
- Upload any of your Valid Government Issued Proof as discussed above.
- After everything is done, just click on Send.
That’s it. After some time, Your Facebook Name will be Changed Successfully. Share your views in comments and share this post with your friends. Keep Visiting.


hi,
Nice Article…
Its very helpful…
Thank you for sharing…
Nice article. Thanks for sharing!
You Have Shared Well Thanks Man
Thanks for your post
Hey Ajit, I think you are doing really great. Nice Post.